The Process of Building and Deploying from Scratch (A Blog Based on the Astro Framework)#

(1) Related Environment Dependency Build (Development Debugging on Windows)#
-
Install pnpm in the Windows environment via Node.js
-
npm install -g pnpm(globally install pnpm) -
By default, global dependencies for npm and pnpm are installed in C:\Users\your_username\AppData\Roaming\npm, we can change it to the D drive.
-
npm config set prefix "D:\npm-global"
- Verify npm config get prefix # should return D:\npm-global
pnpm config set store-dir "D:\.pnpm-store"
- Verify pnpm config set store-dir "D:.pnpm-store"
- Install the required dependencies in the root directory of the blog
pnpm installpnpm add sharp
- At this point, you have successfully deployed this project locally
(2) Deploy Static Web Pages#
- CF Official Website
- Build using Cloudflare's Pages or Workers
- You can also use GitHub for static web hosting
Method 1: Cloudflare (Choose either Pages or Workers)#
-
Pages Deployment
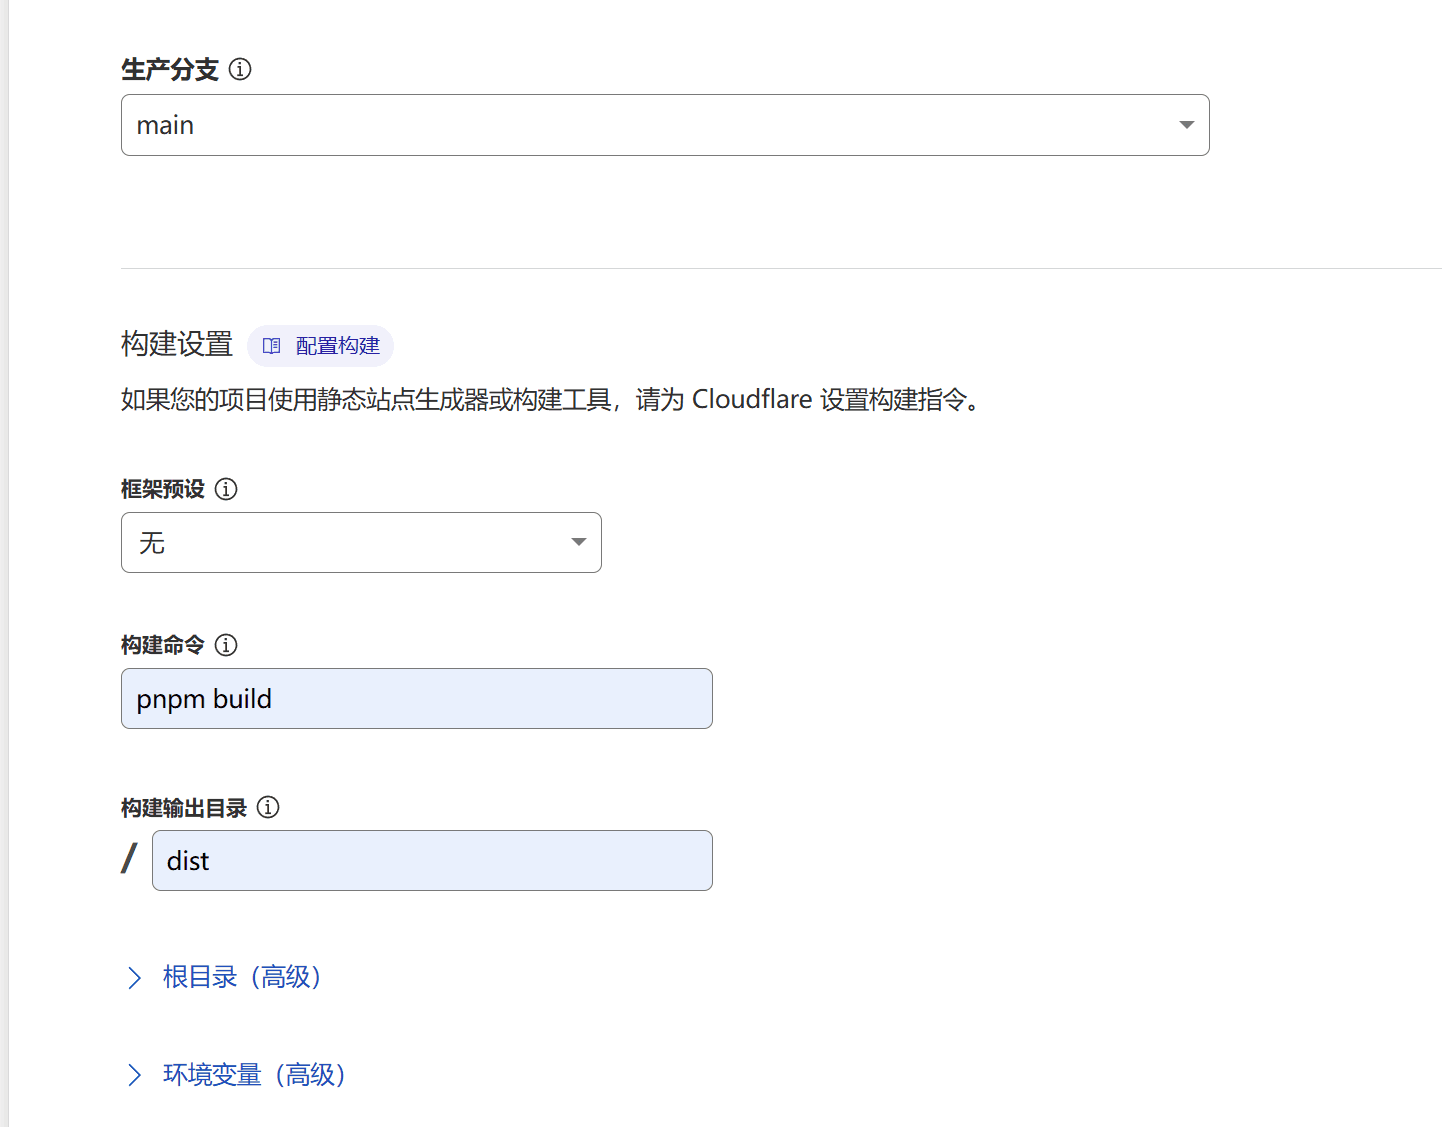
- Open the Pages section of the calculated Pages, upload to the GitHub blog repository, and select the branch you want to deploy
- Fill in the build command and build output directory (which is the static web files output by Astro)
- Save and deploy, it's best to bind your own domain
- Workers Deployment (Currently no migration requirements, will update later)
(CF Official Suggestion to Migrate Pages Projects to Workers)

Method 2: GitHub Static Web Hosting (Automatically Deploy dist Files via GitHub Action)#
-
Create a main file MyBlog-Main-astro on GitHub and a repository specifically for displaying static pages ***(GitHub username).github.io
-
Go to
Settings -> Developer Settings -> Personal access tokens, create a token (classic)
-
Choose the token to never expire and check the repo and workflow options

- For security, save the generated token in the repository's variables, go to
Settings -> Secrets and variables -> Actionsto set it


- Create an automation deployment script in the main file (deploy the dist files output by the main file to ***.github.io)
- Create a new astro_auto_deploy.yaml file under .github/workflows/ and copy the following content into it. For more details, you can refer to the 【GitHub Action Documentation】
name: astro_auto_deploy

# Trigger GitHub action when code is pushed to the main branch
on:
  push:
    branches:
      - main

jobs:
  deploy:
    runs-on: ubuntu-latest
    permissions:
      contents: write
    steps:
      - name: Checkout
        uses: actions/checkout@v4
        with:
          fetch-depth: 0

      - name: Setup Node.js
        uses: actions/setup-node@v4
        with:
          node-version: '20'

      - name: Setup pnpm
        uses: pnpm/action-setup@v2
        with:
          version: 8
          run_install: false

      - name: Install dependencies
        run: pnpm install

      - name: Build site
        run: pnpm build

      - name: Deploy to GitHub Pages
        uses: peaceiris/actions-gh-pages@v4
        with:
          PERSONAL_TOKEN: ${{ secrets.TOKEN }}
          EXTERNAL_REPOSITORY: your_github_name/your_repository_name
          PUBLISH_BRANCH: main
          PUBLISH_DIR: ./dist
          force_orphan: true
          commit_message: auto deploy
- Modify
.gitignorein the main file to avoid committing unnecessary files
# build output
dist/

# generated types
.astro/

# dependencies
node_modules/

# logs
npm-debug.log*
yarn-debug.log*
yarn-error.log*
pnpm-debug.log*

# environment variables
.env
.env.production

# macOS-specific files
.DS_Store

.vercel

package-lock.json
bun.lockb
yarn.lock

.~* // Do not commit backup files in ~ format
- Use VSCode's git to upload the files to the repository. After a successful upload, it will trigger GitHub Action to automatically deploy your static pages.